When I was a teenager, I had a Jersey cow, and I had to milk her two times a day. No one made me do it; having the cow was my own idea. I loved animals, and I loved milk and seeing as how we had an acre of pasture and no good sense, my parents indulged me. I bought a book called The Family Cow, which was a wealth of information about the care, feeding, and yes, milking that was required to keep my cow healthy. With the book and occasional advice from a farmer neighbor, I channeled my interest in agriculture and love for animals into a far-too-ample supply of fresh, delicious, creamy milk. (The pigs got milk, the dogs and cats got milk, and even the chickens got milk. We gave milk to everyone.)
But it wasn’t all butter and cream. There was the whole thing about having to be in the barn every single day at 6 a.m. and 6 p.m. No one else in my family milked the cow; the self-imposed chore was my responsibility. It was hot out there in the summer and muddy as heck in the winter. And sometimes, my cow didn’t feel like cooperating. On those days, it would take a few minutes for her to relax and “let down” her milk, and rushing her made things worse. Sometimes, if her udder was very uncomfortable, she would quite literally kick the bucket– and that beautiful milk would splash into the mud. And if I lost patience, she would escalate, aiming to stomp on my foot or whacking me in the face with a poopy tail.
I was 16 or 17 on the day I had the worst time with her – she had done everything to annoy and inconvenience me. She kicked over the bucket twice. When I yelled at her and whacked her on the butt, she swished her tail hard and stomped a hind foot into the bucket – like, “There, have some mud with your milk, you intemperate teen!” I flew into a rage. I jumped up from my milking stool and went to her head, grabbing her halter with one hand, and I punched her in the face!
And at that very moment, I heard my mother’s voice; she had entered the barn and was standing right behind me. “Oh, Nancy,” was all she said.
I felt profoundly ashamed of myself then, and to this day, I get filled with shame thinking about it. Losing your temper with an animal that you have put into a situation that they would never be in otherwise – and being mad at them for not magically doing what you’ve never really taught them to do – that’s bottom-of-the-barrel behavior. I buried my hot face in my cow’s neck and took some long breaths. Somehow, we got through that milking (though the milk was all ruined).
I’m not saying I’ve never lost my temper with an animal since; far from it. But every time I do, I swear I feel my gentle mother’s deep disappointment with me and feel that shame all over again. And that’s what keeps any frustration I experience with my animal companions in check.
These pups were not habitual playmates when I had the whole litter here. The two girls who looked the most like pure Ridgebacks played together nearly exclusively. The black fuzzy girl was the runt, and was a little intimidated by the much-larger tan girls. But she's caught up in size, and now seems to be highly bonded to her short-haired sister (and vice versa).
I have the privilege (and responsibility) of dog-sitting two of the pups from my most recent foster litter – for a whole week! – while their family is on vacation.
How many of you caught the “two pups, one family” thing? If you noticed it (and winced), you’re probably a dog trainer.
Originally, the family was interested in adopting two pups, and I talked them out of this (they are my former in-laws, so we have more of a rapport than in most cases!). Most training professionals try to dissuade people from adopting sibling pups – and insist on a singleton adoption in cases like this, when the family lacks a lot of dog experience. There are numerous reasons for this, but to name a few:
• Sibling pups often bond more firmly and pay more attention to each other than to the human family members.
• House-training (and every other kind of training) often requires twice (or more) of the time that it takes to train one pup.
• Many families lack the time and resources to separate the pups frequently enough that they learn to be confident and social when they are not in the company of their sibling.
There are more reasons to not adopt siblings (and some workarounds, too) in this article by WDJ Training Editor Pat Miller, and I listed all of them to this family. They listened, heard me, and ended up adopting one of the two females in the litter that strongly resembled a purebred Rhodesian Ridgeback. They named her Xena.
But a couple weeks later, the husband’s mom, who lives in the same town as Xena’s family, met Xena and fell in love with her, and then contacted me to inquire about adopting one of the two remaining pups. I ended up driving to the town where both families live, to give the mom a “meet and greet” with the two last puppies, so she and her husband could choose which one suited them best. They ended up falling for the boy pup, and I left him with her and her husband.
I then visited the family who adopted Xena – who was overjoyed to have a chance to play with her last unadopted sibling, whom she hadn’t seen for a couple of weeks.
Over the course of the afternoon that I visited with my former in-laws, they fell in love with the last unadopted puppy, and made a strong and renewed case to be allowed to adopt her, too. I could have just said no – even though the shelter that I was fostering the pups for would have said yes; they don’t have a policy against multiple-pup adoptions. We discussed the pros and cons again, and I reminded them once again about the many accommodations they would need to make to ensure that both pups would end up as well-trained, socially secure pups who could be separated without trauma. They were willing to do the work, they said.
Two things clinched my decision to permit the adoption to go forward:
1. They were doing a great job already with Xena. After just two weeks in their home, she was clearly bonded to the whole family, responding appropriately to her name, nailing a “default sit” whenever anyone made eye contact with her, and still at a healthy weight. I saw lots of dog toys laying around, and a crate in the parents’ bedroom. (I like to see this; it’s the only way to hear the pup who might be fussing in the night because she needs to go potty. People who put their puppy’s crate in some distant room or worse, the garage, end up with dogs who hate their crates and/or learn to just go potty in the crates, since no one could hear or would respond to their cries of distress.)
2. They are in the process of building a new house on a rural property. Frequently, the dad stays in the not-quite-finished house and the mom stays at their old house in a nearby town. This gives them an easy way to easily and frequently separate the pups for a night or day during this critical socialization period.
It’s hard to believe that these pups came from the same litter; if it weren’t for the fact that they both have ridged backs, you might say it’s very unlikely. They may have had different fathers, since the mother was on the streets when she was impregnated. What’s interesting is that she was said to be part Australian Shepherd and part Rhodesian Ridgeback – and though she didn’t resemble either breed, each of these puppies look like one of those!
But, some weeks later, ironically, I feel like I’m the one who has been most inconvenienced by this sibling adoption. While I’m truly happy to be able to spend a week with the pups (I hardly ever get to get my hands on foster puppies of this age; once they get adopted at about 10-week-old mark, I rarely see them again!), now I have to take my own advice and separate them for training and socializing! Especially since, just as I worried, the family is finding it difficult to find the time to take them on separate outings and hold separate training sessions – so I feel I have to do it! And BOY does it take a lot of time!
One thing I should be doing but just don’t have the time to do is to take them on separate walks. I’m already taking my own two dogs on separate walks on certain days! These days, with 14-year-old Otto losing the physical ability to take long walks, I often take just 6-year-old Woody for a drive to our favorite off-leash trails, and then come home and take Otto for his own walk in our rural neighborhood. At this point, he’s content to walk on leash and leave his mark on trees and shrubs along the roadside; we go about a half-mile up the road and then mosey back to our house. In order to get any work done with the puppies here for the week, I need to exercise them to the extent of their energy and fitness level, so I have been taking them out to the off-leash trails with Woody. This is terrific for tiring them out, but it would be better for their social development if they were taking individual outings, not just relying on each other for confidence in new situations.
Did you or someone you know adopt sibling pups? How did it work out? What were the most challenging aspects of the adoption?
Though I love my two dogs equally, 14-year-old Otto (the fuzzy guy) has had significant health care needs over the past few years, and I expect this to continue until he passes, so I am maintaining his health coverage.
It’s at this time of the year that my dog Otto’s health insurance company sends out a renewal letter. And, of course, the older he gets, the more the annual premium goes up.
It only makes sense. He just turned 14 years old. His healthcare costs have increased. In addition to twice-annual well-dog visits, he gets an annual chest x-ray and abdominal ultrasound; he’s had benign growths removed from his liver, and had (a few years ago) a nearly symptom-free case of pneumonia, so we monitor abdomen and organs (for abnormal masses) and his lungs (to make sure they are clear of excess fluid). Plus, I give him a very expensive daily pain-relief medication for his osteoarthritis; it’s metabolized in a way that stresses the liver less than other nonsteroidal anti-inflammatory drugs, so it supposedly helps with his slightly compromised liver function. (It works, so I’m not messing with it, no matter its cost!)
But, yikes! Today, I had to do some math to see if the increasingly high cost was still worth it. I looked at what I spent this year as a guide:
Total cost of Otto’s vet bills in 2021: $3,025.00
What I actually paid:
Total cost of Otto’s insurance premiums in 2021:
$2,557.37
Deductible:
$250.00
10% of costs (insurance reimbursed me for 90%):
$302.50
Total cost (so far*) in 2021:
$3,109.87
*This includes the cost of his daily medication and the premiums for the entire year, and presumes we have no more vet visits through the end of the year.
If we make no more visits to the vet this year, I will have paid $84.87 more with insurance than if he had not been insured. But, as everyone knows, just one emergency vet visit, with, say, just one blood test and a prescribed medicine or two, can easily cost $500 or more. If Otto has to go to the vet once more this year for even something quite minor, the insurance will have been worth the cost.
Otto takes a very expensive pain reliever for his arthritis, and it works so well for him that I’m loathe to change it. Insurance helps with the cost.
But the peace of mind of knowing that, no matter the cost, I could likely afford 10% of nearly any bill that he might incur… that’s priceless.
The fact is, knock wood, 2021 was one of our most event-free years in a while. The insurance paid off in a major way in the previous two years, when he needed more medical care.
In 2020, Otto incurred $4083.17 worth of veterinary care (including two major dental procedures). I spent $2,252.27 on his insurance premiums, $250 on the deductible, and paid just $408.32 for all those vet bills, because the insurance reimbursed me for 90%. My total was $2,910.59; insurance saved me more than $1,000.
2019 was the year when he had his liver surgery, with two nights spent at the specialty hospital where he had surgery. His total veterinary expenditures that year came to $7,152.45. I spent $1,745.27 on his insurance premiums, $250 for the deductible, and $715.30 for the vet bills (the insurance reimbursed me for 90%) for a total of $2,711.57. Having him insured saved me more than $4,400 that year.
Funny/not funny: Because of the rising price of his insurance premium each year, in 2021, even though he received less medical care than in either of the two previous years, I’ve spent more than in either of those years.
But if Otto hadn’t had insurance in either of those years, I might still be paying off credit card bills!
The increase in the annual premium has gone up steeply; in 2018, the monthly premium for Otto’s coverage was a full $100 less than I’ll be paying in 2022. The difference is more than what I was paying for my younger dog’s coverage.
Yes, I just used the past tense. Despite what I’ve just said about the clear benefit of having Otto insured, two years ago, I actually stopped paying for Woody’s health insurance. (This added to the cost of Otto’s coverage, as I had been getting a multiple-pet discount of 5% prior to cancelling Woody’s coverage.)
Woody’s in the prime of his life and quite healthy. I hope to be able to insure him again when I’m not paying so much for Otto’s insurance.
I’m taking a calculated risk with this tactic. I first bought health insurance for Woody when he was just a pup, and it was a good darn thing. He was an accident-prone adolescent, and I’ve lost track of exactly how many emergency vet visits he had in his first three years (I can think of five off the top of my head, though I think there must have been more). But after he turned about 3 ½, his medical visits reduced sharply (so far! knock wood!). His annual well-dog visit is pretty minimal, and he hasn’t needed a dental yet.
If I had been paying insurance premiums at the current rates for both dogs over the past three years, it would have tipped the balance; I would have been paying more for the insurance than what the two of them have incurred in costs. But, like I said, it’s been a calculated risk. If Woody had suffered from bloat, a torn ACL, or some other major health problem, then I would have been better off with insurance for both dogs.
When Otto dies, I’ll for sure buy health insurance for Woody again; he’s getting to the age that he’ll need a dental and should start having more tests at his annual vet visits.
As much of a fan if pet health insurance as I am, I can’t imagine affording health insurance if I had three or more pets; even with the multiple-pet discounts, it would add up to a lot. At that point, I’m guessing that most people would be better off saving money each month in an account dedicated for direct health care costs.
What accommodations have you made concerning health insurance for your dogs? Has it been worth it? Not worth it?
Why am I just learning about this now? Apparently, some years ago, the ASPCA and Petfinder.com founded November as “Adopt a Senior Pet” month. Both of those organizations promote the benefits of adopting older dogs and cats – defined as just 5 years old or older. Many people are reluctant to adopt older adult dogs and cats, so they tend to experience longer stays in shelters and are at higher risk of euthanasia.
NationalToday.com has an unusually accurate summation of the problem that’s being addressed by National Adopt a Senior Pet Month:
“One misconception older animals suffer from is that they are in shelters because of their destructive or bad behavior. Though this is far from the truth, there are many reasons why a pet would end up in a shelter. Many of these senior pets were once someone’s faithful companions. Changing home circumstances, financial restrictions, death, or relocation can have adverse effects on a pet’s life. These pets have much to offer, and they are usually adaptable. Younger pets can be adorable, but they also demand a lot of attention and can be destructive and very hard work to keep up with. Usually, an older pet can easily fit into your lifestyle and adapt well to a loving new home.”
But here’s a delicious bit of good news: In honor of this national designation, premium pet food maker Stella & Chewy’s is sponsoring the adoption of senior pets – reimbursing adoption fees from a licensed 501(c)(3) non-profit shelter or rescue organization located in the United States or a shelter or rescue organization that is a registered charity in Canada. How cool is that? The fine print: Stella & Chewy has committed $80,000 to this effort, and when they’ve exhausted that amount, their sponsorship will end. So if you know someone who is on the fence about adopting an adult dog (or cat!), tell them about this promotion and see if you can push them over to the joys of adopting a worthy senior. See this link for more details.
Looking for a special gift for a friend – or, better yet, a friend’s dog? We’ve put together this helpful gift guide for dogs, and everything is homemade: homemade dog treats, training treats, or grooming products. You’ll save a bundle, improve the quality of the products, and even have fun customizing them. Healthy homemade dog treats can be customized with fun cookie cutters, and you can pick your ingredients to match the lucky dog’s diet and tastes.
If you start collecting dog-related cookie cutters, you may not be able to stop. These adorable kitchen tools are available in the shape of many breeds and types of dogs.
Years ago, wheat was the main ingredient in dry dog foods and biscuits. To meet the demand for gluten-free foods and treats, some manufacturers substitute peas, beans, and other legumes for wheat and other grains, but those ingredients have become controversial, too. Today, a range of alternative flours are widely available, making it easy to create biscuits and treats for dogs with any sort of dietary restrictions; you can easily make treats that are free of gluten, legumes, fat, sugar, nuts, or salt. Experiment with substitutions!
When making homemade dog biscuits, combine dry ingredients with a mixer, food processor, or by hand, then add other ingredients to create a stiff or soft dough. Line cookie sheets with kitchen parchment paper or lightly grease them before baking to prevent sticking.
Stiff doughs can be rolled flat with a rolling pin and shaped with a cookie cutter, pizza cutter, or knife. Alternatively, shape stiff dough as a log or cylinder, wrap it in plastic wrap, refrigerate until firm, then slice the roll into discs and bake.
Soft doughs can be pushed through a cookie press to create different shapes or rolled into balls and pressed flat with your hand or the tines of a fork.
If using a silicone mold, spray it lightly with oil to prevent sticking, then add the dough and press firmly.
Leaving treats at room temperature for a day or two after baking helps harden biscuits, making them sturdier and crunchier. Depending on ingredients, home-prepared dog treats may last several days to a week or more at room temperature or longer in the refrigerator. For long-term storage, freeze in air-tight containers.
For holiday baking, mix cookie doughs ahead of time and refrigerate or freeze them until a few days before gift giving, then bake and gift-wrap.
Ingredients that are perennial dog favorites and are delicious additions to homemade dog treats include peanut or other nut butters, carob (which tastes like chocolate but is safe for dogs), shredded coconut, carrots, cheese, bacon, and diced or pureed meat, fish, or poultry.
Avoid adding ingredients to your DIY dog treats that are not dog-safe. These include chocolate, raisins, macadamia nuts, onions, and the sweetener xylitol (check peanut butter labels to avoid products containing xylitol).
Homemade Dog Treat Recipes
To test recipes for this article, I used all of the ingredients mentioned here in a variety of cookies, crackers, and training treats, which were enthusiastically tested by 30 dogs of different sizes, breeds, and ages. Here are their favorites:
Ingredients:
3 1⁄2 cups almond, equivalent (see sidebar), or all-purpose flour blend
1 teaspoon baking powder
1⁄4 cup butter
1⁄2 cup finely chopped cooked bacon, fish, meat, or chicken
1⁄2 cup milk or coconut milk
Instructions:
Combine ingredients and mix well to create a soft dough. If you have a cookie press, experiment with different shapes and press cookies onto parchment. If you don’t have a cookie press, create balls and press them with the tines of a fork. Bake at 275 ° F for 30 to 45 minutes or until light brown.
Combine ingredients and form 1/2-inch balls. Press into lightly greased silicon molds or place on parchment-lined cookie sheets and press to flatten with your hand or the tines of a fork. Bake at 350° F for 18 to 20 minutes or until brown.
2 cups almond, equivalent, or all-purpose flour blend
2 cups shredded cheddar cheese
1⁄2 cup cold cubed butter
1⁄4 cup milk or coconut milk
1 tablespoon Herbs de Provence or dried savory herbs such as rosemary, thyme, basil, marjoram, lavender, parsley, and/or oregano
You’ll be tempted to share these Savory Cheese Ribbons with your dog – but ask first!
Instructions:
Combine ingredients and mix well to create a soft dough. If you have a cookie press, use a star-shaped or sawtooth tip and move the tip while pressing the plunger to create ribbons. Cut the ribbons into 2- to 4-inch lengths. Bake at 350°F for 18 to 25 minutes until light brown.
Most packaged “soft” treats contain vegetable glycerin, a plant-derived sweet syrup that acts as a moisturizer and preservative. Food-grade vegetable glycerin is easy to find online and in natural food stores. I experimented with soft treats by adding vegetable glycerin to different recipes with good results. Honey also works well in soft treats.
Ingredients:
2 cups cooked, mashed sweet potato or pureed pumpkin
1/2 cup grated apple or 1⁄4 cup applesauce
1⁄4 cup honey or vegetable glycerin
1 egg
1 1⁄2 cups almond or equivalent flour
Instructions:
Combine ingredients and scoop the dough with a spoon to form mounds on prepared baking sheets. Bake at 350° F for 20 minutes. Refrigerate after baking to maintain soft consistency and prevent mold growth.
Sweet potato chews are incredibly easy to make, cost a fraction of what you’d pay for them in a pet supply store – and most dogs absolutely love them. If you’ve ever picked up a $20 bag of sweet potato chews and thought you could make them yourself for a lot less, you’re right. In fact, nothing could be simpler. Here’s how to make these dog treats.
Sweet potato chews are incredibly easy to make, cost a fraction of what you’d pay for them in a pet supply store – and most dogs absolutely love them.
Cut raw sweet potatoes or yams into slices (lengthwise or crosswise) between 3⁄8 and 1/2 inch thick. Bake at 250° F for an hour, turn slices over, bake for another hour, and repeat until they’re completely hard. Or let them finish drying in a food dehydrator set to low heat. Once completely dry, these chews have a long shelf life and do not require refrigeration. Several of my tester dogs preferred these to all the other treats.
Gummy Gelatin Dog Treats
Gelatin is the key ingredient in sweet or savory dog gummies. Unflavored gelatin powder is available from Great Lakes, Knox, and other widely sold brands. Compare labels if you prefer gelatin from grass-fed cattle. Gelatin is recommended for aging joints, increased mobility, improved digestion, strong bones, and skin and coat health. Unfortunately, gelatin does not freeze well. Use these homemade dog gummies as training treats or additions to your dog’s dinner.
To make gummies for dogs, sprinkle 2 tablespoons gelatin powder over 1⁄4 cup unheated
coconut water, bone broth, soup stock, or other liquid and let stand a minute or two until the gelatin is absorbed. Heat 1⁄2 cup of the same liquid until almost boiling, add it to the gelatin, and stir.
If desired, add 1⁄4 to 1⁄2 cup chopped meat, fish, chicken, pumpkin puree, or other additions. Pour into a lightly oiled silicon mold, loaf pan, or tray. Refrigerate until firm. Remove gummies from silicon molds. If using a loaf pan, remove the single slab of cold gelatin and cut it with a knife or cookie cutters. Refrigerate gummies, tightly sealed, for up to 2 weeks.
A Guide To Ingredient Substitution
If your dog has certain dietary restrictions or you want to make some of these DIY dog treat recipes grain-free or gluten free, some replacement flours can be substituted for equal amounts of wheat flour but others require adjustments. The following ingredients can be substituted on a one-to-one basis (equivalent flours) for wheat flour:
Several gluten-free flour blends contain almond flour, coconut flour, arrowroot starch, tapioca starch, cassava flour, rice flour, potato starch, or other ingredients designed to replace equal quantities of wheat flour. Look for “gluten-free flour” or “Paleo flour.”
Almond meal (ground whole almonds) or blanched almond flour (ground after skins are removed).
Buckwheat, millet, rice, or sorghum flour.
Oat flour (use rolled oats, quick-cooking oatmeal, or make your own oat flour by grinding oats in a blender or food processor).
Sunflower seed flour (may be labeled as “sun-flour”).
Coconut flour: Replace 4 cups wheat flour with 1 cup coconut flour and add 1 or 2 eggs or additional liquid (coconut flour quickly absorbs liquids).
Green banana or plantain flour: Replace 4 cups wheat flour with 3 cups banana flour.
Carob powder, plain or toasted: Replace 1/4 to 1/2 cup of wheat (or equivalent) flour with an equal amount of carob powder.
GLUTEN-FREE FLOURS These widely sold gluten-free blends and many like them are available in supermarkets, natural food stores, and online.
King Arthur Gluten-Free Measure-for-Measure Flour. Contains: Rice flour, whole grain brown rice flour, whole sorghum flour, tapioca starch, potato starch, cellulose, and xanthan gum, and is vitamin fortified.
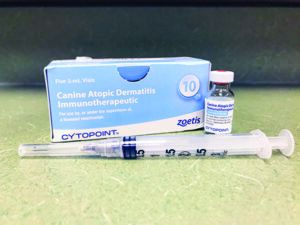
Apoquel and Cytopoint, both manufactured by Zoetis, have been around for some time now – eight years and five years, respectively. They represent the newest and most effective drugs in the veterinary arsenal to stop itching in dogs with allergies – but their use is not without risk of side effects or contraindications. That said, these drugs have vastly improved the lives of many severely allergic dogs without any ill effects whatsoever.
Before I explain why these drugs are so ground-breaking, allow me to briefly explain why allergies are so hard to treat in some dogs, and how the veterinary medication predecessors to these drugs differ.
Dog Allergy Treatments
The hallmark of allergies in dogs is normal, healthy-looking skin that seems to itch. The offending allergen is either inhaled (atopy) or ingested (food allergy). Inhaled allergens frequently cause seasonal itching (only in the spring or only in the fall). Food allergy typically causes itching year-round.
The goal of allergy therapy is to eliminate the itch. If you don’t stop the underlying itch, your dog will scratch, chew, bite, and rub his way to secondary skin infections, which add a second layer of itch and discomfort.
There is a complex, biochemical cascade, with lots of different mediators, that occurs between the allergen first being recognized by the body and the result, which is skin inflammation and itch. In broad terms, treatments for managing the allergic itch block or interrupt this cascade at various points. The more complete the block or interruption, the better the allergy itch control.
It would be ideal if it was possible to completely prevent the dog from coming into contact with any of the substances that he’s allergic to, but in the case of atopy, this is pretty much impossible. It is possible in the case of food allergies – if you can identify the food or foods that your dog is allergic to by undertaking a diet trial. To properly rule out food allergy, you must feed either an extremely limited-ingredient diet containing only ingredients that are novel for the dog (he’s never eaten them before) or a hydrolyzed protein diet and nothing else for eight to 12 weeks, and see if the itch subsides. (If it doesn’t, atopy, not food, is likely the issue.)
Most of the medications used to relieve allergy-caused itching don’t manage food allergy itch very well, so if you skip this step, you may end up disappointed and frustrated.
In lieu of complete protection from contact between the dog and the substances he’s allergic to, the gold standard for managing allergies is still allergy testing and immunotherapy (allergy shots), just like those that humans get.
The goal of this therapy is to stimulate the dog’s body to create antibodies against his allergens, thereby blocking the inflammatory cascade right at the starting gate. Unfortunately, this is not the most popular approach to allergy management for pet owners, as it is expensive, labor intensive, not without risk, and comes with no guarantee.
So we move on to medications. Antihistamines are inexpensive, available over the counter, and safe. The problem is, they don’t work very well in dogs. They definitely won’t help in the face of a full-blown allergy inflammatory breakout. Blocking histamine at that stage is just too late.
Probably the most useful place for antihistamines would be leading up to your dog’s allergy season. If you know he has trouble in the fall, starting an antihistamine ahead of time might help dampen his initial reaction to his allergens. Or, if a prescription medication is helping but not giving 100% relief, sometimes adding an antihistamine will help. Discuss this with your veterinarian.
Steroids work well to stop allergic itching and their effect is immediate, but they come with a plethora of negative effects on the body, including immune suppression. I’ll still prescribe them for severe, acute cases, but only in the beginning, to get the inflammation under control. After that, we look for a safer, long-term solution.
Atopica (cyclosporine) was approved by the Food & Drug Administration in 2003. It’s a reasonable alternative to steroids for longer-term allergy management. But like steroids, it can cause immune suppression. It also takes too long to kick in. It can be as long as four to eight weeks before you see maximal response – way too long for the allergic dog and his owner to wait.
Newer Dog Allergy Medicine
The newest allergy treatment options are Apoquel and Cytopoint. These medications interrupt the inflammatory cascade at different points. They are both rapid-acting and have minimal side effects. There are pros and cons to each which we will discuss.
Apoquel
Apoquel (oclacitinib maleate) blocks the effects of cytokines, which are pro-inflammatory proteins heavily involved in the allergy cascade. It is an oral tablet administered twice daily for 14 days, then once daily. It takes effect quickly, within 24 hours, and works really well for many dogs. Side effects are not common, but vomiting, diarrhea, loss of appetite, and lethargy have been reported.
The results of safety testing done on Apoquel suggest the possibility of some immune suppression when using this drug. This is one of the potential downsides of Apoquel. Some dogs developed significant infections (pneumonia) and demodectic mange, which typically occurs in the face of immune suppression. This was especially true in puppies, which is why the drug is labeled for use only in dogs 12 months or older. It’s also not for use in breeding dogs or pregnant or nursing mothers.
Neither I nor my colleagues have had issues in our clinic with Apoquel causing immune suppression, and I do not hesitate to use it in appropriate patients. But the possibility makes careful monitoring of these patients prudent.
There is also a label warning – “Use with caution” – regarding the use of Apoquel in dogs with tumors. Cytopoint may be a better choice for these dogs, since it has no warnings or concerns regarding tumors.
Sometimes Apoquel works great when dosed twice a day, but not as well when the dose is reduced to the once-daily, long-term dose. I see this a lot in the clinic, and it’s so disappointing for the pet owner. A number of owners have asked me if they can just continue with twice-daily dosing. Unfortunately, long-term safety studies at this dose have not been done. Apoquel can be used this way off-label, but there is no way to know if it’s truly safe for your dog.
My preference for these dogs is to continue the Apoquel once a day (as labeled) and add Cytopoint. These two medications are perfectly safe to use together, and in my experience, this combination is often the magic bullet for those difficult-to-manage allergy dogs.
Cytopoint
Cytopoint is injected subcutaneously and must be administered by a veterinarian. But it lasts for four to eight weeks and has fewer potential side effects than Apoquel
Cytopoint (lokivetmab) is a monoclonal antibody against the cytokine interleukin 31 (IL-31), a big player in the allergy inflammatory cascade. It is an injectable medication, administered under the skin. It takes effect quickly, relieving itch within 24 hours, and typically lasts anywhere from four to eight weeks.
Side effects are rare, but once again, vomiting, diarrhea, loss of appetite, and lethargy have been reported. Pain or discomfort at the injection site occasionally happens, but typically is mild and short-lived if it occurs. Cytopoint is not immune-suppressive, and there are no warnings or concerns about tumors.
However, the one potential downfall of Cytopoint is that the dog can form antibodies against it. If this happens, then the medication will lose its effectiveness – forever. I haven’t seen this yet, but if your dog is responding well to Cytopoint at first, and then less and less so, this is likely what’s happening. I hope I never see it.
As a practicing veterinarian, I really like Cytopoint. If I had an allergic dog, I would choose Cytopoint first.
If you have an allergic dog, hopefully this information helps you as you navigate your journey. As always, the best advice for you and your dog comes from your veterinarian.
Once they have learned a cue for "wait" (in the context of waiting to be released to eat their food), most dogs are able to easily generalize the behavior to different situations, such as waiting to go out a door, waiting to jump out of a car, and so on.
The behavior has several different names (inhibitory self-control, emotional self-control, self-regulation), but the term “impulse control” is used frequently in dog training. It means that dogs can resist the temptation to perform an unwanted behavior that would give them access to a desired reinforcer – that is, they can control themselves.
Puppies aren’t born with impulse control (nor are children); it has to be learned – and it can be encouraged and deliberately taught! Teaching your dog to develop his impulse control is a valuable use of your time because, as dogs learn to control their behavior, we can relax and enjoy their company without feeling like we always have to control them.
Generally, humans don’t consider a dog to have a problem with self-control unless his impulses drive him to exhibit behaviors we don’t care for. It’s when dogs do things like help themselves to food on the coffee table or kitchen counter (counter surfing), jump up on people when greeting, dart out doors before invited to do so, or grab things from the hands of their humans that dogs tend to be labeled as lacking in impulse control. From the canine perspective, however, a dog who does these things is just helping himself to something he wants: food, contact with humans, freedom, or a desired toy or other item.
Fortunately, with relative ease, most dogs can learn to resist the impulse to help themselves to these things – practicing delayed gratification or accepting an alternative reward – when their humans implement several impulse-control behaviors already frequently taught in the force-free training world, including Wait, Leave-It, Polite Greeting, Mat, On-Off Switch, and more.
WAIT
As much as we force-free trainers love teaching dogs to do stuff, I will admit that “Wait” is one of the most useful behaviors I teach my dogs, as well as my favorite impulse control exercise. Unlike a formal “Stay” cue, which means “Stay in the exact position you are in and don’t move until I tell you to,” I use “Wait” more informally to mean “Pause.”
We teach “Wait” using a food bowl. This gives you one or two built-in training sessions every day (depending on how often you feed your dog) – no excuses! “Wait” can then be easily generalized to waiting at doors, or any other situation where you want your dog to be able to control herself (i.e., not rushing forward to greet the senior citizen with the walker, or not grabbing the hotdog out of the toddler’s hand). Here’s how to teach it:
1. Have your dog sit and tell her “Wait!” Put a mixture of some of your dog’s regular food and some high-value treats into her food bowl. You can use her regular food as a treat if she’s highly food-motivated, but to make a greater impression, use the higher-value treats for reinforcment.
Hold the bowl at shoulder level (off to the side so you’re not lowering it directly under her nose), and before she can (or does) move, mark her “pause” with the “click!” of a clicker or a verbal marker such as the word “Yes!” Then take a treat out of the bowl and feed it to her.
If she gets up before you click, tell her “Oops, sit!” and try again.
If she gets up after you click and treat, just ask her to sit again before the next repetition. Repeat several times, telling her “Wait” each time.
2. With the bowl at shoulder level, tell her “Wait,” and lower the bowl a few inches. Mark (with a click or “Yes!”) if she’s still sitting, and quickly raise the bowl back up; then take a treat out of the bowl and feed it to her.
If she gets up when you lower the bowl, try again, and lower it only a fraction of an inch.
3. Gradually lower the bowl a bit more, still starting at shoulder level, telling her “Wait” each time, with several successful repetitions at each new position before going lower. If you get two “Oops!” in a row, you’ve gone too quickly; back up to where she can succeed and proceed more slowly with your bowl-lowering.
4. When you get the bowl all the way to the floor, set it down, click, and pick it back up before giving your dog the treat. Repeat several times, telling her “Wait” each time. (Be ready to raise the bowl quickly if she tries to go for it!)
5. Next, when you get the bowl to the floor, click, but leave the bowl on the floor while you feed her the treat. Repeat several times, telling her “Wait” each time.
6. Finally, tell her “Wait,” set the bowl on the floor, click and treat, and tell her, “Okay, you can have it!”
Dogs who naturally have better self-control may “get it” in one session. Those who are more challenged by their impulses may need to practice over a period of several days or more before you get the bowl to the floor. At each mealtime practice session, work as long as practical for you and your dog, then just go ahead and set the bowl on the floor with an “Okay you can have it!”
Eventually you’ll be able to ask her to wait while you put the bowl on the floor, and you won’t have to mark and treat, just release her; her meal is the reward.
LEAVE IT
You need to wear shoes for this exercise! To teach your dog “Leave it”, show your dog that you have a yummy treat, and let her see you put it under your shoe. Say “Leave it” in a cheery voice; it’s a cue, not a threat or a warning! Wait while she tries to lick or paw the treat free.
I use “Trade” when a dog already has something that I want in her mouth.(See “Protocol for Teaching a Safe ‘Trade’ With Your Dog,” May 2020, for information about how to teach your dog to happily give you something he has that you want.) But I teach “Leave It” for the random object on the ground that my dog covets – and that I don’t want her to grab.Here’s how:
1. Show your dog that you have a high-value “forbidden object” in your hand – something you’re going to tell her she can’t have. I use freeze-dried liver cubes for this – they are high-value and durable. Let her sniff it, lick it, even nibble at it, but don’t let her have it.
2. Say “Leave It!” as you hold up the cube, then immediately place it on the floor under your foot, to protect it. (Note: Wear sturdy shoes. Do not do this barefooted, with open sandals, or in your nicest shoes!)
3. Let your dog sniff, lick, nibble, and chew in an effort to reach the treat under your foot. She might even paw at your shoe (hence, the no-sandals or bare feet suggestion). If her tongue can reach the cube under your shoe, tip your toe forward so she can’t lick it.
Just wait; she will eventually give up. The instant she stops sniffing, licking, or looks away from the treat, mark (click or “Yes!”) and give her a tasty treat. As she gains fluency at this behavior, you may be able to move your foot away and still have her “leave it”.
4. Wait. Don’t repeat the cue; she will eventually give up. The instant she stops sniffing, licking, etc., or looks away, even by accident, mark (click your clicker or use a verbal maker, such as the word “Yes!”) and give her a tasty treat. She’ll probably immediately return her attention to the forbidden object under your foot, so just wait some more. Don’t repeat the cue. When she looks away again, mark and treat again.
5. If possible, mark-and-treat again before her nose returns to your foot. You want to reinforce “Look-away, look-away, look-away, keep-looking-away” not “look at foot-look away, look at foot-look away.”
6. After several repetitions, pick the cube up, show it to her again, repeat the “Leave It” cue, and place it under your foot again.
7. When she looks away from the cube easily, move your foot slightly to uncover the treat and give repeated mark-and-treats as long as her nose doesn’t return to the treat. She gets rewarded for staying away from the cube even when it’s visible and seemingly accessible. Keep your foot close! If your dog dives for the food, just re-cover it with your toe to prevent her from getting it. Mark/treat again when she looks away.
8. If your dog completely ignores the forbidden object on the ground, try tapping your toe next to it to draw her attention back – but be ready to cover it up quickly! Remember, she doesn’t have to look back at the cube and then look away – you want continuous “look-away” behavior.
9. Eventually you’ll see your dog’s “Aha!” moment – that golden moment in training when you see your dog really understands. With Leave It, that moment happens when she looks at the exposed treat, considers it for a moment, then looks up at you in anticipation of the mark and treat. Celebrate!
10. Next, place the forbidden object on the floor without covering it with your foot (be ready to protect with your foot!). Repeat numerous times until you can place it in plain view on the floor and she doesn’t try to get it.
Now you can generalize Leave It to more real-life situations. (For help with generalizing the behavior, see “How to Teach a Dog to ‘Leave It’” June 2018.)
POLITE GREETING
This is an important impulse-control behavior in any dog’s repertoire. It requires that you not reinforce her for jumping up – and that you prevent the rest of the world from reinforcing her as well! – while you reinforce her generously for an incompatible behavior such as Sit. You can simply turn your back and step away when she jumps up if she’s roaming free (or step into another room and close the door) – and you can use a leash or tether for more concentrated practice.
A tether was essential for teaching this little dog to stop jumping on kids; he had a long history of being reinforced for jumping up on kids (and licking and biting them). Once he was prevented from reaching the kid, he was able to learn to sit when he wanted to greet a child.
1. With your dog tethered to a solid object, approach slowly and calmly, wait for her to sit, then mark (with the click of a clicker or a verbal marker such as the word “Yes!”) and feed her a treat. If she jumps up, just step back out of her reach. Note we didn’t tell you to say “Sit.” We want her to think of and offer that behavior on her own, not be waiting for a cue. Use body language (such as leaning back and/or lifting your hands to your chest) to help her sit if necessary (quickly fade the use of this body language). Just don’t use your regular cue for Sit!
2. As she starts offering sits consistently when you approach (and you consistently reinforce these), gradually increase the energy of your approach until you can greet her with excitement, and she still sits and stays sitting until you release her.
3. Now generalize the behavior to the rest of the world. With your dog on leash, have another person approach her. Instruct them to approach calmly and tell them to step back if she jumps up. When she sits politely at their approach, mark and treat her for sitting. They can then greet and pet her but remind them to move back if she gets up.
Eventually, if you want, you can have the people approaching feed her a treat – providing they understand they must move away if she gets up.
MAT
Place the treats you use to reinforce any on-the-mat-behaviors on the mat. This will help your dog understand that being on the mat is a rewarding place to be! Use the higher-value treats every time she happens to lie down; she will likely start offering downs more frequently – excellent!
The introduction of the “place mat” is a brilliant addition to the force-free training repertoire. The place mat is a portable rug, bed, or blanket that you teach your dog to lie down and settle on. The more comfortable the mat, the easier the training.
When your dog learns to park herself on her mat you have an incredibly useful tool to help with impulse control at home as well as in new environments or those with guaranteed arousal-causing distractions. Here’s how to train the behavior:
1. Hold your dog’s mat and show great interest in it: Examine it, talk about it, sniff it, and so on, until your dog shows interest in what you are doing.
2. Place the mat on the floor. Have a supply of medium- and high-value treats. When your dog looks at, sniffs, or shows any interest in the mat, mark and place a medium-value treat on the mat for your dog to take.
3. Continue to mark for any mat-related behaviors (except for grabbing it and playing with it!), placing a medium-value treat on the mat each time you mark.
4. Any on-the-mat-behaviors (OTMBs) deserve a mark-and-treat, but if she offers a down, she gets a high-value treat. Other offered OTMBs still get medium-value treats. Continue to mark any OTMBs, but occasionally cue her to “Down” on the mat. When she does, mark and give her a high-value treat.
5. After you have cued, marked, and treated a half-dozen random downs interspersed with her other behaviors, pause for several seconds and see if she chooses to offer you a down when she doesn’t get marked for other behaviors. If she does, mark and feed her several high-value treats. If she doesn’t, go back to marking any OTMBs, interspersing cued downs. Again, deliver high-value treats for downs and medium-value treats for other behaviors.
6. Repeat step 5 until your dog begins offering downs during your pauses. Your dog is learning that downs get better rewards. She should soon begin offering only downs on the mat, even though other behaviors will still get medium rewards.
7. Now give your dog a release cue, move a few steps away from the mat and invite her to follow you. When she does, stand quietly and ignore her – no marks, treats, or praise. Most dogs will return to the mat to prompt you for more treats. (If she doesn’t, go back to Step 5.) If she does, start marking and treating again, using medium-value treats for any behavior, high-value treats for downs. You are reinforcing her for returning to the mat. Downs are great if they happen, but remember to reward any OTMBs. Gradually increase your distance from the mat.
8. When she consistently/quickly returns and lies down on the mat each time you move away, increase time in small increments – a few seconds at a time. If she gets off the mat before you release her, pick up the mat, ignore her for a minute, place the mat down and try again.
9. When your dog will go to her mat and lie quietly on it for an extended period of time, you can add your cue – “Mat,” “Place” – or whatever you want to call it. Practice sending her to her mat from increasing distances and eventually from anywhere in the house.
10. Finally, add distractions and generalize the behavior. Start with kindergarten-level distractions – jump once, jump twice, clap your hands … gradually work up to college level – kids running through the house, dropping food on the floor … and eventually PhD work – doorbell ringing, visitors entering, and anything else that might challenge your dog’s self-control. When she’s good with distractions in the home – take it on the road; generalize it to the rest of the world!
ON/OFF SWITCH
Sometimes your dog will just get excited by some stimulus. Many dogs get super amped when the leash comes out because it is such a reliable predictor that “good stuff is about to happen!” Asking them to calm down can be counterproductive – you’re paying attention to them (reinforcing!) as they leap about, and they just get more excited as you interact with them. I use “Oops!” as a “no reward marker,” meaning “That behavior doesn’t get reinforced – in fact that behavior makes the good stuff go away …” and then I take away the opportunity for reinforcement.
If I have the leash in my hand when my dog starts to leap with excitement, I say, “Oops!” and lay the leash on the table, then go sit down. If I was holding a toy, I’d say, “Oops!” and hide it behind my back or turn away. If I was opening the door, I’d say, “Oops!” and walk away.
When your dog can remain calm as you pick up the leash, hold up the toy, or open the door, she has learned impulse control – she can control her excitement in order to make the good stuff happen.
Note: I prefer “Oops” to the “eh-eh” that some trainers use, as it’s really hard to say “Oops” in an aversive tone of voice, while “eh-eh” can end up sounding quite nasty. The intent is simply to give information in a neutral or cheerful tone – “That behavior made the good thing go away” – not to be angry or intimidating to the dog.
Your goal? To help your canine companion learn to control her own behavior so you can live harmoniously together in a relationship of mutual love, trust, and respect, knowing your dog will choose to do the right thing even when temptation looms, and knowing you don’t have to be the behavior police.
We tested five compostable plant-based (non-plastic) pet waste pick-up bags, and a compostable paper sheet that can be used in place of a bag. These are great, earth-friendlier alternatives to using plastic bags for picking up dog poop.
As the saying goes, “Sh*t happens,” and as every responsible dog owner knows, cleaning up after their dogs is an absolute must. For those of us who try to be good stewards of the environment, biodegradable poop bags seem like a smart choice. Who wants to think of their dog’s poop festering away in a traditional polymer bag designed to survive a zombie apocalypse?
Unfortunately, the term “biodegradable” isn’t all it’s cracked up to be. When it comes to dog waste bags, Kermit the Frog was right: It’s not easy being green.
“Biodegradable” means “being of a substance or object capable of being decomposed by bacteria or other living organisms.” The definition offers no parameters as to how long it will take to achieve decomposition. Will a traditional polymer bag eventually degrade? Sure. But ecologists estimate it takes about 10 to 20 years in the environment and 1,000 years in a landfill.
“Landfills are built to exclude air, light, and water, so things that are in there will be there for a lifetime,” says Bob Borrows, a waste-policy analyst with the Oregon Department of Environmental Quality. Another problem? When traditional plastic bags degrade, they leave behind microplastics that contaminate the environment.
COMPOSTABLE DOG POOP BAGS
At this juncture, our recommended course of action is to buy compostable poop bags. “Compostable” is defined as being made of “organic matter able to be made into compost.” Today, many eco-minded manufacturers of pet waste bags offer a product line of compostable bags.
Compostable waste bags are provided to users at the Great Bark Dog Park in Lafayette, Colorado, and the waste collected at the park is being composted in a collaboration between the Lafayette Parks, Recreation & Open Space Department and the Lafayette Waste Reduction Committee
Most compostable pet waste bags are considered bioplastics; they look, feel and perform like plastic, but are typically made from renewable resources such as plant starch and are designed to breakdown via microbial activity. In a commercial composting facility, this can take about 90 days. If the bag is rated for home composting, the process can take 180 to 360 days, depending on climate and condition of the composting environment.
Further, we recommend looking for compostable bags that are ASTM D600 certified. ASTM is a voluntary standards organization, and D6400 certification ensures the product will successfully degrade in a way that will not negatively diminish the value or utility of the resulting compost.
That’s great news! But there’s some bad news: These plant-based bags are more expensive to produce than conventional plastic bags; your cost for fewer bags may be twice what you’d pay for plastic.
Moreover, while plant-based bags and poop are compostable, few commercial composting facilities in the United States accept pet waste – so you can’t just toss that bag of poo into the green yard trimmings bin with alacrity. And, while it’s not impossible, creating the ideal recipe for a high-temperature compost (needed to kill pathogens) at home can be challenging.
So why opt for the added expense and effort to source plant-based bags if they’re still likely to linger in a landfill?
Companies making the effort to produce waste bags that conform to compostability standards are, in general, striving to be earth-friendly in all facets of business. Using sustainable raw materials in a plant-based waste bag is still more eco-conscious than producing traditional polymer bags. Plus, it’s another small step we can all take to reduce our dependence on products made from fossil fuels.
OUR TOP PICKS FOR PLANT-BASED DOG WASTE BAGS
We selected five popular brands of plant-based dog waste bags that conformed to the ASTM D6400 standard. That standard looks at product compostability, including whether or not the degradation of the material may diminish the value or utility of the resulting compost.
Of the five brands, two (Doggy Do Good and Give A Sh!t) are also certified by TUV Austria (a European standards organization) for home composting.
Worth noting: It’s recommended that vegetable-based bags be kept in a cool, dry area and be used within a year of purchase.
All five brands feel durable. None of the bags tore improperly from the roll, all five were easy to open, and all withstood a reasonable amount of stretching and tugging.
In looking at our third-place bags, these products received a lower rating only because they failed to survive a pocketed trip through the washer and drier (a common occurrence for most dog owners!).
Also, in the case of the BioBag product, we marked it down for being substantially smaller, making it more difficult to flip the bag inside out to encase the mess without feeling like the mess was dangerously close to your hand. If you obsessively check your pockets on laundry day, or pick up after a small dog, these minor issues may not affect you.
RECOMMENDED COMPOSTABLE PET WASTE BAGS
WDJ Rating
Product Name & Maker
Price
Size
Comments
4 out of 4 Paws
Doggy Do Good Premium Pet Waste Bags
doggydogood.com
$9.99 for 6 rolls of 10 bags on Amazon
13.4” x 7” Folded; 13.4” x 11” with gussets expanded
20 microns thick
Unscented. ASTM D6400 Certified. These bags can handle a big load! Core made from recycled material. We like that they’re also available as handle bags on a roll and a dispenser box. Large enough to accommodate litter box cleaning and diaper disposal. Company donates to six different animal welfare organizations on a quarterly basis. Survived the laundry test!
4 out of 4 Paws
Lucky Dog PoopBags
luckydogpoopbags.com
$6.99 for 4 rolls of 15 bags on Amazon
13” x 9”
17 microns thick
Unscented. Plenty big enough to “glove up” and handle the job. From an environmental standpoint, we like that Lucky Dog rolls don’t have a core, however, that does mean rolls won’t work as well in most traditional rolled-bag dispensers. We appreciate the detailed explanation of conditions needed for biodegradation. Company donates 1% of profits to environmental causes. Survived the laundry test! The lighter color does little to disguise the contents, and we wish the bags were also available as a boxed bulk roll.
3 out of 4 Paws
Give a Sh*t Poop Bags
giveasht.com
$12.99 for 8 rolls of 15 bags on Amazon
12.5” x 9”
18 microns thick
Unscented. Nice large size. Packaging and core made from recycled material. We like that the company offers a plastic-free dispenser made of canvas that also has room for keys and treats. Bonus points for the punny company name and cute line drawings of dogs on the bags. Company donates 10% of profits to animal protection charities. Survived the laundry test! We do wish the bags were also available as a boxed bulk roll.
2.5 out of 4 Paws
Earth Rated Compostable Poop Bags
earthrated.com
$8 for 6 rolls of 10 bags on Amazon
13” x 9”
20 microns thick
Available in unscented and lavender scented. Large size. Packaging and core made from recycled materials. Company makes both certified compostable bags and bags made from polyethylene with an additive said to accelerate degradation in a landfill environment “when the bag is exposed to anaerobic landfill conditions (heat, oxygen, agitation and moisture).” We find this claim confusing since, by definition, “anaerobic” means “without oxygen.” The Earth Rated poop bag did not survive the laundry test; it melted onto itself while pocketed in the drier, rendering it unusable.
2.5 out of 4 Paws
Bio Bag Pet Waste Bags
biobagpet.com
$4.99 for 50 bags on Amazon
11.5” x 8”
23 microns thick
Unscented. The smallest of all the bags we tried. Company website says product is also available in a larger size, but it was difficult to find and considerably more expensive on Amazon. Most readily available as a 50-bag perforated-top flat pack. We appreciate that the company notes the bags are designed to be composted in a municipal/industrial facility and acknowledges that such a facility may not exist in the purchaser’s area. Packaging also refers users to findacomposter.com, to aid in the search for an appropriate facility. The Bio Bag did not survive the laundry test; it melted into itself while pocketed in the drier, rendering it useless.
Leaders In Canine Compost Capability
While traditional composting facilities in the United States aren’t jumping at the chance to add pet waste to their roster of acceptable feed streams, a handful of forward-thinking entrepreneurs and citizens’ groups are successfully implementing pet-waste composting programs to help reduce the carbon footprint of man’s best friend.
EnviroWagg in Aurora, Colorado, built an entire business out of composting dog feces, compostable bags and all, by partnering with a local residential dog-waste cleanup service and several area dog parks. The composted waste becomes Doggone Good Potting Soil, available online and in select Colorado retail locations. Owner Rose Seemann even wrote a related book, The Pet Poo Pocket Guide: How to Safely Compost and Recycle Pet Waste.
Similarly, a handful of dog parks and open space areas throughout the United States have started composting programs, including Marsha P. Johnson State Park (formerly East River State Park) in Brooklyn. Dog-owning park guests contribute to the enclosed pile using available scoopers or rapidly degradable paper waste bags. Sawdust is added to create the proper carbon-to-nitrogen ratio, and the compost pile is carefully attended to and monitored by park staff. The resulting fertilizer is used only on ornamental plants and flowers throughout the park, and, as an added precaution, away from children’s playground areas.
Canadians are even more ahead of the game, with some areas allowing pet waste contained in certified compostable bags in green bins meant for yard trimmings, and many professional poop-scooping services, such as Turd Wranglers of Chilliwick, BC, offer both scooping services and a stand-alone waste removal service for owners happy to scoop or bag-up pet waste themselves, but who wish to keep the “doody deeds” out of the landfill by paying to have the waste delivered to an appropriate facility.
Get on the Paper Train: Pooch Paper
Ready to ditch pet waste bags all together? Enter Pooch Paper, a large sheet of recycled, non-chlorine-bleached, coated paper – sort of like wax paper. It’s strong enough to grab our test dog’s considerable-sized pile, but it required a little more focus to entrap the mess within the paper, which doesn’t conform to your hand as well as a pet waste bag. It was easier to use on dirt and very short grass. I struggled to grasp a mess in plush grass when individual “poo nuggets” separated from the pile and sank into the grass.It’s a bit like the dexterity one has wearing a glove versus wearing a mitten.Even though waste bags cover the hand like a mitten, they still allow for a trickier clean up. I’d trust Pooch Paper to a somewhat soft pile of poo, but anything resembling diarrhea would be a no-go.
Once the mess is contained in the paper, you just twist up the edges and carry it by the top of the bundle until you find an appropriate receptacle. With a twist of the wrist (versus a knot) being all that keeps the mess contained, I wouldn’t want to travel too far before pitching the poo.
Pooch Paper comes in a box of individually folded sheets. It would take some care to stash a few sheets in a pocket or the zippered “Pooch Pouch” leash attachment (sold separately). I’m not sold on Pooch Paper for a long outing with the potential for multiple poops along the way – but this could be a great alternative to bags for apartment dwelling dog owners on quick “potty runs” throughout the day. Pooch Paper’s main benefit? It’s really, truly, fully biodegradable and compostable. $13 for 50 small (12″ x12″) sheets or $13.50 for 50 large sheets (14″ x 14″) at poochpaper.com.
This got us thinking: If your pet’s pile can be easily contained in a 12″ sheet of paper, why not use unbleached compostable parchment paper, which can be torn to whatever length you desire? This could be a viable option for owners of small dogs with smaller “piles,” and, at just $3.50 for 45′, is very economical!
If your dog frequently vomits a yellowish liquid, particularly in the morning, he (and your rugs) would benefit from a series of interventions to help resolve this uncomfortable condition.
Photo Credit: Keechuan/ Dreamstime.com
Some dogs are prone to vomiting either first thing in the morning or in the wee hours of the night. It’s usually just a small amount of vomit, typically yellowish in color and somewhat frothy or foamy. And it’s more common in younger dogs.
I’ve always called it empty-stomach bile vomiting. The medically correct name for it is “bilious vomiting syndrome.” The word “bilious” comes from the Latin billis (bile) and ous (having or full of). Bile is a fluid that is produced by the liver and secreted into the upper part of the small intestine, where it aids digestion. Sometimes, however, bile backs up into the stomach, inflaming the stomach lining.
This all sounds terrible, but to be honest, the worst thing about the term bilious vomiting syndrome is the word syndrome. When medical professionals use the word syndrome, it generally means we have no idea what causes it. If we know what causes a problem, it’s a lot easier to prevent and treat.
Theoretical Causes of Your Dog Puking Yellow Bile
The certain cause of bilious vomiting syndrome is unknown, but veterinary medical science has some theories. The most widely accepted theory is that a combination of decreased stomach motility and a weak sphincter muscle between the stomach and small intestine allows bile from the small intestine to essentially backwash into the stomach and sit there. Bile is supposed to be in the small intestine, and it causes no problems there. It is not supposed to be in the stomach. When it is, it’s very irritating to the stomach lining, resulting in vomiting.
Other Causes of Your Dog Throwing Up Yellow
But because vomiting is a symptom associated with many other conditions, it is important to rule out any underlying diseases before attributing it to bilious vomiting syndrome.
The list of differentials for chronic vomiting is long. We’ll mention a few here, but this list is not meant to be all-inclusive:
Addison’s disease (underactive adrenal glands)
Cancer
Food allergy
Gastric foreign bodies
Gastritis/ulcers (can be secondary to things like nonsteroidal anti-inflammatory drugs [NSAIDs], stress, mast cell cancer)
Helicobacter (bacteria thought to cause chronic vomiting)
Hiatal hernia (stomach sneaks up into the chest)
Inflammatory bowel disease (IBD)
Intestinal parasites
Pancreatitis
Physalopterosis (a stomach worm dogs can get from eating crickets, especially in the Midwest)
Slow-moving intestinal foreign bodies
The medical workup to rule out underlying issues like these starts with a physical exam. Helpful blood tests might include blood chemistry, complete blood count, baseline cortisol (for Addison’s disease), canine pancreatic lipase (CPL, for pancreatitis), and, to rule out IBD and other gastrointestinal (GI) issues, a fasted blood panel (comprised of cobalamin, folate, trypsin-like immunoreactivity [TLI], and pancreatic lipase immunoreactivity [PLI]).
Other tests that may be needed to solve mysterious, chronic vomiting include fecal exam, chest/abdomen x-rays, abdominal ultrasound, endoscopy, and biopsy. Obviously, your dog may not need all these tests, depending on preliminary test results.
To rule out food allergy, a diet trial with a hydrolyzed protein diet is usually recommended. (Fortunately, a diet trial for food allergy that causes GI upset requires only 10 to 14 days; in contrast, diet trials for skin allergies must be done for a grueling eight to 12 weeks.)
Physaloptera, the stomach worm, is usually not found on a routine fecal test for parasites. If your veterinarian thinks this is at all a possibility, empiric treatment may be recommended. (Endoscopy is usually necessary to find this worm, which is a pretty aggressive, invasive test for a condition that is not that high on the list.)
Similarly, an infection with theHelicobacter pylori bacteria can be hard to diagnose. Empiric treatment may or may not be recommended by your veterinarian, depending on level of suspicion.
Treatment of Bilious Vomiting Syndrome
Most dogs will appreciate the addition of a bedtime snack to their diet. If your dog is overweight, however; don’t add calories; reserve a small portion of his evening meal and feed it at bedtime. Photo Credits: Sanja Grujic/ Dreamstime.com
Once it’s been determined that your dog likely suffers from bilious vomiting syndrome, it’s time to try to make it better. I recommend changing one thing at a time, in case that one simple step will resolve the issue. If one step alone doesn’t resolve it, continue and add the next step. The solution might involve a combination of all the steps.
Step 1: Feed a small meal at bedtime. For small dogs, just a biscuit at bedtime might suffice. The idea is that food in the stomach increases gastric motility and will buffer any bile that sneaks in. If that doesn’t work, add Step 2.
Step 2: Divide the dog’s daily food allotment into multiple small meals throughout the day. The idea is to stimulate the stomach into continuous motility, thus preventing bile from seeping backward into the stomach. If those two things don’t work, add Step 3.
Step 3: Add an acid-reducer like omeprazole (Prilosec). Omeprazole is usually dosed twice a day, but after the first week you can give just one dose at bedtime. Sometimes you can even get to every other night dosing with omeprazole. Famotidine (Pepcid) can also be tried (and it kicks in faster than omeprazole), but tolerance to famotidine develops over time, making it less effective in chronic situations like this.
Step 4: If those three things don’t work, I usually add a “prokinetic” medication (which increases gastric motility). Metoclopramide (Reglan), cisapride, or low-dose erythromycin are medications your veterinarian may prescribe. When prescribed for other issues, metoclopramide is typically dosed three times a day. For bilious vomiting syndrome, usually just one dose at bedtime is all that is needed.
If those four things don’t work, add Step5.
Step 5: Ask your veterinarian about adding a gastroprotectant (which may make the stomach less sensitive to the bile irritation). Sucralfate (Carafate) is usually prescribed for this.
The good news: Bilious vomiting syndrome is considered a benign condition. It must be uncomfortable for your dog, however, and cleaning up vomit every day certainly isn’t fun for you. We hope these tips will help you eliminate this unpleasant, chronic condition.
When I take longer or harder hikes now, I have to leave my senior dog, Otto, at home. It’s for his own good; he just gets too sore on the day after – or even later that day – following the longer walks that my younger dog and his even younger friends need to tire them out. Knowing that I’m preventing him from getting too sore to get up easily doesn’t make it any easier for me, though: As soon as Otto sees the signs that a walk is impending (leashes gathered, treat bag getting filled, sneakers getting put on) he will station himself in front of the door. If he’s outside, he will stand behind my car, with a determined “I’m coming with you!” look on his face. And he knows the difference between me getting ready to go for a walk and me getting ready to go grocery shopping; he doesn’t stand in the way of my departure for the store!
Otto is still very capable of joining me and my friends for a walk of a mile or two in cool weather. This last interminable, hot, dry summer was hard on him, as he doesn’t tolerate the heat well; I’d take him only for very short walks where there was water available for wading and swimming.
The catch-22: He needs to keep moving to stay fit; he just can’t go as far or as fast as the younger dogs. So I’ve taken to taking him for his own walks, just him and me. And I have to say that it’s a delight.
The places where I usually walk with my dogs are all off-leash areas. I almost never see anyone else on my local trails, and when I do, I can easily call my dogs to me and leash them for the minute or two it will take to pass by whomever else might be out there. So I don’t often have to walk my dogs on leash, but for Otto’s safety, when we walk around our own rural neighborhood, he has to be on leash – especially because he can no longer hear oncoming cars well, or me calling him back to me. But around here, as we walk alongside our country roads, walking Otto on leash is a pure pleasure; he’s got amazing on-leash skills.
When I adopted Otto, way back in the summer of 2008, I hadn’t yet discovered the wonderful off-leash areas and trails that I drive to for most of my longer walks; I mostly walked Otto in and around my small town. And I’m not bragging, but we walked so much that first summer (as I was trying to get him tired enough to not stay awake all night barking at the stars), that we really perfected Otto’s polite leash-walking skills. He doesn’t pull and he doesn’t lag. He might walk a little bit ahead of me – but so what? I don’t need him to stay right at my side, and I don’t mind if he wants to stop and sniff something every so often. His hearing has gotten very bad, but his vision is still very good, and he often spots a squirrel going up a tree or a stray cat crossing the road ahead of us before I do. He’ll raise his tail and prick his ears, and then look back at me with shining eyes: “Mom, did you see that?” Though he “checks in” with me occasionally when we are on an off-leash walk with other dogs, when it’s him and me, connected by a leash, he stays much more tuned into me, communicating more with me about what he’s seeing and smelling.
It’s a hassle to find the time to take two walks on our dog-walking days, and to make extra food-stuffed Kongs to bribe Otto into not looking sad when I’m loading up Woody for the drive to one of our off-leash trails for a long walk, but the extra time alone with Otto is sweet – and absolutely worth it.
The first session of any group training class can be overwhelming (for pups and people) - and may have you feeling like a total failure afterward. If you stick with it and put our tips into practice, we guarantee you will be impressed with how much better you feel about yourself and your dog by the last class.
Those of you who have just emerged from your first-ever group dog obedience training class have my sympathies. For the unprepared, that experience can be a rude awakening.
Whether your pup is pulling wildly toward the other dogs, acting like she’s never met you, barking while the instructor talks, or hiding under your chair, the first class may feel like a nightmare. In fact, you may be tempted to tell people this is actually your neighbor’s dog and you’re just pitching in.
After that kind of introduction, many dog owners listen to the little voice in their head whispering, “Let’s just forget we paid for all six lessons and call it a day.” That’s a shame, because when humans stick with it, they often walk out of Class #6 stunned at the turnaround they’ve experienced.
To help make sure you get to that magic day, the best programs have a surprising rule for Class #1: No Dogs Allowed. During that key first hour, blissfully free of doggy distractions, the instructors set up the humans for success. They set appropriate expectations and give some make-or-break tips on how to manage your dog during class.
If your upcoming class doesn’t offer that dog-free first class, make yourself a nice cup of tea, sit down in your quiet kitchen, and absorb these five survival tips before you head into the joyful chaos that is Doggy 101.
1. Bring your sense of humor and reasonable expectations.
Sometimes the secret to life is low expectations, and that is dramatically true here. Assume the first class or two will feel ridiculously hard. Be thrilled if anything goes right! Getting your head in this generous space is key, because the more stress you bring into that training area, the more your dog will feel it. Take a deep breath, and don’t lose your sense of humor.
Keep in mind that this is not a competition. If your dog is the most disruptive in the class, don’t shrink in embarrassment. Instead, find the warmest fellow student so you can share a smile about it. Then remember that this means you have the greatest potential for the most improved award after six weeks!
Bring a pouch full if “canine trail mix” – an ample supply of a variety of top-tier treats, pre-cut into tiny pieces. You don’t want to run out before class is over! If you have too many, put the pouch in your fridge overnight and use the rest the next day!
2. Use amazing dog treats.
Know this: The same dog who sits and stays beautifully for you in your kitchen will act as if he does not even hear you in class. With the explosion of distractions – a different space, other dogs, and new people – you’re going to need help drawing your dog’s attention back to you. Put serious thought and prep into surprising your new student with fabulous dog treats in class, linking the first training experience with this giant positive. Think dried fish, liver, cheddar cheese, fresh chicken.
Also: Bring more food than you think you’ll need. First-time students always run out! You’ll be asking your dog for many behaviors in this hour, and you need to be ready to reward. You’ll be using tiny pieces (the size of a pea), but it adds up. This all means you need an official treat pouch. That Baggie in your pocket is going to be way too clumsy to work with.
(Oh, and yes: This talk about food reveals that I assume you have followed both the very strong science and your good heart, and have sought out a trainer who is committed to positive reinforcement.)
3. Start in the parking lot.
You’re going to drive up to class with a treat pouch packed with terrific treats and ready to go. The next little secret is to let your dog or pup in on this news the minute you get out of the car. Wave that tiny piece of ham past his nose and ask for a quick moment of attention – and reward it when it happens. Your newly focused-on-you pup thinks, “Wow! What is happening?!”
As you continue to walk in, ask for any behaviors that are solid at home – perhaps sit, or shake, or a look in response to his name. As your pup revels in his sudden ability to snag some previously unheard-of treats just by listening a bit, you’re walking successfully past the dogs and people who might have been a crazy distraction before.
Do that every time you come to class, and soon you’ve built a pattern. You’re the most reliably rewarding thing in your dog’s life, even when you’re out and about. Get ready for some very nice attention to follow.
4. Expect to miss some instruction.
During class, be ready to keep on working hard just managing your dog. Don’t worry if that means you miss a bit of what’s being said! You may find it helps to present your pup with a new chew like a bully stick so that you can listen to the instructor as she explains the next exercise. If your pup is slightly more advanced, you can quietly ask for (and reward!) sits, touches, and looks while the trainer is talking.
“Wait, how am I supposed to listen if I’m busy with toys and management?” I hear you. It is frustrating. But even if you have to work so hard on managing your wild creature that you barely absorb the official goings-on, this experience can be a fantastic hour for your pup. You’re out of the house, and pup is seeing the world. And if you’re staying cool and positive, then it’s bonding time for the two of you. Next time, it’ll be easier, and the time after that, even more so. Just keep your head in the right place and keep on coming!
5. Do your homework!
While we humans are working our bums off during class, our dogs are maybe, sort of, halfway learning a thing or two. The truth is that what’s really happening in that class is that humans are learning how to teach various behaviors effectively. It’s the at-home practice that results in your dog truly learning the behaviors.
Carve out a few minutes a day to practice exactly what you did in class. Do it in the kitchen, progress to the backyard, then take the big step to the distraction-filled front yard. Be ready to be amazed at 1) how much your dog adores this time with you, and 2) how incredibly smart your pup is.
One of the best ways to make your at-home training more effective is to ask somebody else to take a few quick videos of you working together. (Or just prop your phone up at the right angle and record!) Even dog trainers catch themselves making mistakes that way! Look closely, find that misstep, and watch how your results change. You may well find yourself addicted to noticing tiny improvements each week.
Obviously, I’m a big fan of a well-run group class. I offer private, in-home training, but I encourage all of my clients to also find a class, and here’s why:
Those distractions that are so challenging at first end up being gold in terms of teaching your dog to focus in any environment.
You learn so much from watching other teams work together.
You gain perspective when you see everybody else’s strengths and weaknesses.
Both you and your dog make friends – which can start with funny commiseration and build into great playdates, joint walks, and even pet-sitting trades.
Finally, yet another bonus to group class: You’ll have an audience of witnesses to cheer the fact that you’ve really come a long way from that first crazy day!
Good thing they are so darn cute! Preventing the pup from chewing on everything but the toys you bought her; teaching her to go potty only outside and never under the dining room table; introducing her to a collar, harness, and a leash... There are challenges to navigate with a new puppy. But there is no better investment of time and attention to all of those challenges than the first days and weeks you spend with your new pup.
For the past few weeks, as I have been working on this issue, I have also been promoting my latest batch of foster puppies to potential adopters, making arrangements for them to come and meet the pups, trying to make the best matches between the puppy candidates and the interested families … and, inevitably, saying goodbye to each darling little puppy face – sending them off with their new families for the start of the best lives I can hope for them, with tears and kisses on the puppy lips.
While doing that emotional work, though, I’ve also been answering questions from the adoptive families: What food should I buy? Do they have to sleep in a crate? How many more vaccinations do they need? How soon can I walk them around my neighborhood?
Then there is the information that I want them to know that is a priority for me – things they have not thought of (yet) but that I know will come up! Stuff like, what sort of collars, harnesses, and leashes to buy (and not to buy), how to housetrain the pups, and why they should have signed up for a puppy kindergarten class already.
No matter how much emailing we have been doing in preparation for puppy pick-up day, there is always something I feel I have missed. For years, I have been saying I need to compile a whole puppy manual that contains answers to every question that adopters have asked me, with all the information that I have learned over the past 24 years from all of WDJ’s contributing writers – who are amazing trainers, veterinarians, and nutrition experts. But the demands of the next month’s deadline arrives soon enough (and sometimes, so does the next litter of foster pups), so that manual just doesn’t get done.
For now, for my most recent puppy adopters, this article, full of references to past articles in WDJ, will have to do. And who wants to read a book anyway? People want short, digestible answers to their most urgent questions, so here’s my best attempt at it.
Q: What’s the secret to housetraining? Start thinking about it on the ride home. Plan to carry the pup from the car straight to the area where you want her to eliminate, and make sure that no other dogs or people are present to distract or intimidate her. And then just wait with her calmly, for as long as it takes for her to “go.” (Prepare yourself to wait to empty your own bladder until your pup has emptied hers!)
The goal is to immediately give her a safe, quiet place where she feels relaxed enough to empty her bladder (and perhaps her bowels) – so when, in another hour, after introducing her to her new home and family, allowing her to drink her fill, and perhaps having a little meal, you take her outside, she will recognize that safe space and, more quickly this time, “go” again. Praise be! And treats, too.
From then on, for the next few days, your job is to shadow your new pup every minute that she is awake – and to whisk her outside at every moment that it appears she might be feeling, er, a little full. That thought will occur to her routinely, within a minute or two after drinking, eating, or waking up from a nap – and then, of course, at random moments in between all that.
The only times you can relax and take your eyes off your pup in these first few days? When she’s outside or enclosed in a crate or small exercise pen – some place that she will be disinclined to make a mess. (I’d add, “or sound asleep,” but puppies have a way of waking up and going pee the moment you step out of the room!)
The secret, if all of this can be boiled down to one sentence, is, from the first minute in your home, to never give her an opportunity to make a mistake and eliminate in your house, to give her many, many opportunities to eliminate outdoors, and to richly reward each of those outdoor successes. (And if she does eliminate indoors, to make every effort to remove every scent-bearing molecule of the urine or feces, so it doesn’t enter her nose to alert her subconscious brain that “It’s time to pee again!” every time she walks by that spot.)
Q: What should I feed her? I’d say, “Find out what she’s been getting fed and start there ….” but in the case of many shelters and rescues, you may not be able to get an answer. And, in any case, you may want to change her food anyway.
The first thing to do is to make sure that you are buying foods that are formulated to meet the needs of growing puppies. Look for the “nutritional adequacy” statement on the bag, a.k.a. the “AAFCO” statement. (It’s called this because it will reference the Association of American Feed Control Officials in the statement.) For puppies, the statement must say that the food meets the nutritional requirements of either “dogs of all life stages” or for “growth.”
Next: As regular subscribers know, I’m a big proponent of feeding dogs and puppies a lot of variety. The more kinds of foods they get, the sturdier their digestion seems to become. I buy small bags for puppies, so I can determine what they like the most and what foods and ingredients best agree with their little digestive tracts. The most critical part of this is to keep track of what you are feeding and how her tummy handled it by noting any deviations from a nice, normal poop.
To keep track of what I’ve fed, I like to cut out the ingredient panel from the foods I am feeding and tape them on the calendar (I write down the name of the food on the start date of each bag, and then do the thing with scissors and tape when the bag is finally empty.)
As to the notes about poop? It doesn’t matter whether you note this in your online calendar program or the calendar hanging on your kitchen wall – just note it! You can’t possibly remember it otherwise. A liquid poo, a trend toward constipation, terrible gas? Make a note.
After a few months, you should start seeing some trends. If she tends to turn up her nose at a particular brand, stop buying it. If fish-based foods seem to give her the runs – cut them out of your rotation. If she vomits a few times each time she’s being fed from a bag of beef-based food, start avoiding beef-based foods! If she gets itchy on certain foods, go back and look at your calendar for clues; what do those itch-correlated foods have in common? It may take time and detective work, but you should start to see trends.
“But wait!”you say. “I’ve always heard that you should switch foods gradually, over the course of a week or more!” Unless your pup is one of those whose digestive tract is very touchy, or who turns out to be allergic to a number of food ingredients, if you switch foods frequently, you should be able to switch foods at the drop of a hat without any reaction at all.
Crate-training goes best when it’s undertaken slowly and with sensitivity regarding the puppy’s response to being in there. You’ve got time and other tools available for safety confining the pup; use them as long as needed to get your puppy’s complete and happy buy-in.
Q: Should I crate-train her? In my opinion, teaching a dog to be comfortable in a crate is doing them and you a huge favor – if for no other reason than making them feel safe and calm when they have to be crated (in a small cage) at the vet or in an environmental emergency. As a volunteer at my local animal disaster-response group, I have seen how traumatic it is for some dogs who have been separated from their families during wildfires and floods to be held in a crate – and how others accept the containment placidly, fully trusting that their owners will return to let them out at some point. If an earthquake, tornado, flooding, or fire separates you and your dog, may he never be the former, only the latter!
That said, it’s not necessary to start a rigid crate-training protocol on Day 1 in your home – and frankly, I think there are more puppies who get traumatized by a “crate them at all costs!” approach than there are puppies who happily accept this close confinement. I like to see a crate present and in use from Day 1, but with the door open! Let your pup begin to associate it with only good things. Toss treats into the crate, smear some peanut butter on the back wall (if you have a plastic crate), and feed him his kibble in a scatter in there – all with the door open. If it seems like he’s happy hanging out in there, reward him with one of his favorite toys, chewies, or a nice big meaty raw bone.
Of course, it’s nice (and sometimes quite necessary) to be able to secure the pup in an enclosed space to keep him out of trouble for a period of time that’s commensurate with his ability to “hold it.” If your puppy is already completely relaxed and calm about being in the crate with the door closed – well, you’ve hit the jackpot. Don’t abuse this or take it for granted! Don’t make him stay locked in there for too long at first, or his willingness to go in may quickly fade. If, in contrast, he’s still on the fence about being in the crate, and anxious about you shutting the door, don’t rush it! Either invest in a nice, sturdy exercise pen, so he can be contained but not feel quite as trapped. (Or, put him in a small room, like a bathroom or baby-gated kitchen, that you can thoroughly puppy-proof; put up all soaps and cleaners and garbage pails and anything that can be pulled down, such as shower curtains or brooms and mops.)
If you need to leave him alone in his safe confinement area for more than an hour or two, you should also provide him with a legal place to eliminate. Training pads, litter boxes, turf boxes, and even special watertight bathroom boxes are available for this purpose.
Then, as he matures, keep up the crate-training, never over-using it, forcing him into it, or failing to let him out when he’s miserable in there. While many trainers used to say that it was important to wait until a dog or puppy stopped crying or pawing at the door to get out, we know now this approach can (and frequently does) backfire, creating a dog who panics not only when he’s in the crate, but when it appears he’s going to be left home alone at all.
Look on the bright side: Everyone in your home will be reminded to keep their floors clean and shoes put away. Your home may never look so neat and tidy again.
Q: How do I keep him from eating my socks and chewing on the furniture? The extent of the puppy-proofing that’s necessary varies from pup to pup. I’ve fostered some pups who could be trusted to hang out alone in my office for hours with no crating or puppy-pens whatsoever, despite the availability of multiple electrical and computer cords under my desk and books, magazines, and knick-knacks on shelves all around the room and at puppy-height. In contrast, I’ve had others I couldn’t take my eyes off for a moment without something getting chewed up.
And then there is Exhibit A, my own dog Woody, my only foster-failure (foster puppy that I kept) to date, who spent the better part of his first year chewing on our furniture and parts of the house, for crying out loud. He chewed nearly through a young apple tree trunk in the yard! If it was wood, he would chew it. (I blame my husband for naming him Woody, because he wasn’t chewing wood before he was named that!)
Though I (clearly) wasn’t always successful at it – he was particularly challenging! – I knew how to prevent this:
Give him a wealth of “legal” chew toys. Determine what textures he likes best – hard plastic, plastic with “give,” meaty bones, bull pizzles, wooly toys, fabric toys, and perhaps, yes, wood – and make sure he has a lot of them. (Finding sticks and pieces of untreated lumber that wouldn’t splinter when Woody chewed them was our hobby for a year or so.)
Prevent his unfettered access to the things you don’t want him to chew. Use baby gates or doors to keep him out of rooms that can’t be puppy-proofed and puppy pens to protect bookshelves, or to fence off your home office desk so the pup can’t go under and chew on cords. Pick up socks and underwear, put shoes in closets, put the kitchen and bathroom trash under the sink, and so on.
Every time you catch him with something he’s not supposed to have, don’t yell, admonish, or snatch it away; go find his favorite toy or a handful of particularly delicious treats, and trade him the toy or treats for whatever he has.
This phase will pass, I promise. Woody hasn’t eaten a tree or door frame in years.
A couple of days ago, I received a text from a dog-training client, wondering about a video she had just watched—and which she linked in the text. “Is meat meal bad for dogs?” she asked. She followed that message with, “I get that she’s selling her own pet food, but is it (meat meal) that bad?”